A:
Let’s go hands-on, anchoring an object to text together. If you’re already comfortable with threading text frames. Go ahead and set up your own facing pages document with three to five pages and a single story running between them in a series of two or three-column frames
1. With your text ready to go, find a place on the first page of the story about midway down the first column. Highlight two words, and give them an obvious and contrasting color like blue, green, red, or orange. The color isn’t necessary to create anchored objects, of course; we’re just doing it as part of this exercise solely so we can easily pick out the location of the object anchor we’ll insert momentarily.
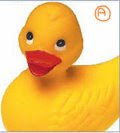
2. Deselect the text and text frame, and place an image, any image, into the document. I’m going to use the infamous Photoshop sample file Ducky.tiff, found in the Samples folder under the installation folder of any recent version of Photoshop. If you chose a large image, scale it down to about the width of a single column of the text.
3. On the Text Wrap panel (Window >Text Wrap), choose Wrap Around Bounding Box to push text out of the way of the image. Again, although you may elect to use a text wrap on a real project, we’re doing it now just to simplify this exercise—it’s easier to watch the colored tracking text if it isn’t hidden behind the image.
4. With the image still selected, cut it with Cmd+X/Ctrl+X, and switch to the Type tool by pressing T.
5. Insert your cursor between the two words you re-colored and paste with Cmd+V/Ctrl+V. You should see something like what I have in Figure A. Wait, you might say. That’s just a simple inline graphic. Correct, we’ve just inserted an inline graphic, which is nothing revolutionary. What is different, however, is how InDesign has redefined the role of inline graphic.
 6. After pasting, your image frame should still be selected. If it isn’t, grab it with the black arrow Selection tool, which will select the image and its frame (the Direct Selection tool will select just the image inside). The frame is the key part of this. Now, choose Object >Anchored Object >Options to open the initial, deceptively simple view of the Anchored Object Options dialog (see Figure B).
 With Position set to its initial value of Inline or Above Line, examine the Anchored Object Options dialog for a moment and its functions should be easily gleaned. If not, don’t sweat it; after this initial exercise, we’ll go through what everything means.
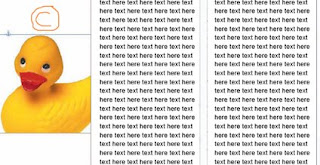
7. For now, check the Preview box at the bottom, and arrange the dialog onscreen such that you can clearly see it and the image we’re working with. Now, set the Position field to its other option, Custom. Your image should jump similar to mine (see Figure C).
9. With the Type tool, return to the story a paragraph or so above the colored text. Begin typing. It can be anything you want, just as long as you add a few lines or a new paragraph. We don’t want so much new copy that the colored text goes into the next column, not yet. As you insert new text, as the colored tracking text is forced to move down the column, you should see the image move down to follow. Hurray!, you’ve just made your first anchored object, an image that will follow a specific place in the text without ever needing to be manually repositioned.
10. Zoom to the point where you can see the entire spread onscreen. Insert a lot more text, enough to push the colored tracking words to the next page across the spread (copying and pasting paragraphs will be much faster than typing).
Where did your image go? Right: it not only followed the text, it swapped sides of the page. That was the effect of the Relative to Spine option I had you check a moment ago. The anchored object alignment was relative to the spine—in this case, using defaults, it was positioned away from the spine. Thus, when the text jumped from a left-read to a right-read page, the anchored object swapped sides of the paper to stay in the outside margin away from the spine.
Now that you’ve got the basic how-to of anchored objects down, pick your jaw up off the floor, and let’s dive a little deeper into this tremendous time-saver.

1 comments:
Graphic Designing Solutions: Indesign: What Is Anchoring And How To Do It? >>>>> Download Now
>>>>> Download Full
Graphic Designing Solutions: Indesign: What Is Anchoring And How To Do It? >>>>> Download LINK
>>>>> Download Now
Graphic Designing Solutions: Indesign: What Is Anchoring And How To Do It? >>>>> Download Full
>>>>> Download LINK Zf
Post a Comment
Please enter you comments or your question what ever you have regarding Graphic Designing. Thanks