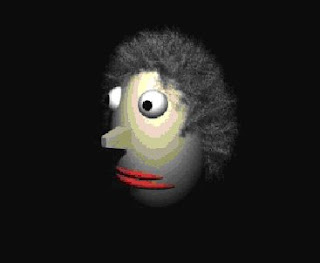
Due to some bussiness I couldn't upload the part 2, please accept my apology.
here starts the "use of plugin shag hair"......
In the following tutorial, you will take the file from the previous tutorial and create both dark brown hair using sub-material ID’s, then create a clown-like hair style by applying a material directly to the ShagView object.
First up, let’s use a SubMaterial ID. To begin, we need a new material for the head, so open up the Material Editor.
1. There, you will find a beige skin colored material. Select that material preview window if it isn’t already selected.
2. Click on the Material Type button. This launches the Material/Map browser.
3. Select a Multi/Sub-object material and choose to keep the material as a sub-material. Then click OK.
4. This places the beige material in the Material ID slot #1. Copy that material to slot #2 as well. When you do, if you have a shaded camera view, you will see the area where the hair is emitting has turned gray.
5. Click on the Material located in slot #4. This takes you to the Standard Material rollout for that sub-material.
6. Click on the blank button next to diffuse to apply a map. This launches the Material/Map browser. Select Bitmap and choose OK.
7. When the Bitmap rollout appears, click on the blank button. This launches a file selection dialog box. Select the file Dryleave.JPG from your MAPS/Ground folder.
8. Once you have selected the Map, turn on Show Map in Viewport.
9. Choose Go to Parent twice, and then assign the material to the Head object. Now, the map doesn’t appear yet because we need to have mapping coordinates.
10.Select the head and go to the Modify command panel. Apply a UVW Mapping modifier. Set the mapping type to Box with a size of 70 in the X,Y, and Z directions. You should now see the map on the head.
11.Now, let’s setup the hair. Go to the Environment dialog box. You should see the Shag:Hair and Shag:Render entries from the last exercise. Click on Shag:Hair.
12.Scroll down to the Shading, Geometry, Quality rollout. For the Tip color, enable the Sub-Mat ID spinner and set the spinner to 4. Repeat for the Base color as well.
13.Close the Environment dialog box and render the scene. At this point, the Shag: Hair strands will take their coloration from the underlying material on the scalp of the head. This is great when working with animals such as zebras or leopards, where you want a specific pattern applied to the strands.
Another method for applying materials is to simply select the ShagView object and add a material directly to it.
14.Now, let’s create a clown hairstyle this way. Open the Material Editor and select an empty material slot.
15.In the Diffuse Map slot add a Gradient Ramp material. The default colors of Red, Green and Blue work fine here. Under the Coordinates rollout, change the W Angle value from 0 to 90. This will rotate the map 90 degrees so that the gradient will run along the length of the individual strands, and will start out blue, and change through green to red.
16.In the scene, select the ShagView object. Assign the material you just created to this object.
17.Re-render the scene.
First up, let’s use a SubMaterial ID. To begin, we need a new material for the head, so open up the Material Editor.
1. There, you will find a beige skin colored material. Select that material preview window if it isn’t already selected.
2. Click on the Material Type button. This launches the Material/Map browser.
3. Select a Multi/Sub-object material and choose to keep the material as a sub-material. Then click OK.
4. This places the beige material in the Material ID slot #1. Copy that material to slot #2 as well. When you do, if you have a shaded camera view, you will see the area where the hair is emitting has turned gray.
5. Click on the Material located in slot #4. This takes you to the Standard Material rollout for that sub-material.
6. Click on the blank button next to diffuse to apply a map. This launches the Material/Map browser. Select Bitmap and choose OK.
7. When the Bitmap rollout appears, click on the blank button. This launches a file selection dialog box. Select the file Dryleave.JPG from your MAPS/Ground folder.
8. Once you have selected the Map, turn on Show Map in Viewport.
9. Choose Go to Parent twice, and then assign the material to the Head object. Now, the map doesn’t appear yet because we need to have mapping coordinates.
10.Select the head and go to the Modify command panel. Apply a UVW Mapping modifier. Set the mapping type to Box with a size of 70 in the X,Y, and Z directions. You should now see the map on the head.
11.Now, let’s setup the hair. Go to the Environment dialog box. You should see the Shag:Hair and Shag:Render entries from the last exercise. Click on Shag:Hair.
12.Scroll down to the Shading, Geometry, Quality rollout. For the Tip color, enable the Sub-Mat ID spinner and set the spinner to 4. Repeat for the Base color as well.
13.Close the Environment dialog box and render the scene. At this point, the Shag: Hair strands will take their coloration from the underlying material on the scalp of the head. This is great when working with animals such as zebras or leopards, where you want a specific pattern applied to the strands.
Another method for applying materials is to simply select the ShagView object and add a material directly to it.
14.Now, let’s create a clown hairstyle this way. Open the Material Editor and select an empty material slot.
15.In the Diffuse Map slot add a Gradient Ramp material. The default colors of Red, Green and Blue work fine here. Under the Coordinates rollout, change the W Angle value from 0 to 90. This will rotate the map 90 degrees so that the gradient will run along the length of the individual strands, and will start out blue, and change through green to red.
16.In the scene, select the ShagView object. Assign the material you just created to this object.
17.Re-render the scene.


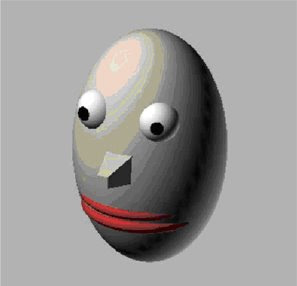
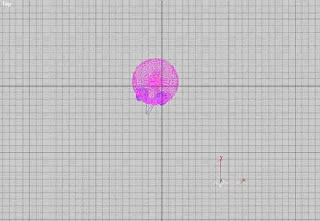
 12. Scroll down in the Editable Mesh command panel to the Edit Surface rollout. Change the Material ID spinner to 4. Turn off Sub-Object mode.
 14. Now, let’s setup the actual hair system. From the main MAX pulldown menus, select Rendering / Environment. This launches the Environment dialog box.