So read and lean…………….
Understanding Hair Concepts
Before getting into the tutorial, you need to understand some basic concepts about the Hair system along with some terminology.
The individual hairs in Shag: Hair system are called strands. There are two types of strands: Vertex Strands and Middle Strands. Vertex strands are the objects that appear in the view-port when you assigned an object as an emitter for the hair system.

The next level of hair in the system is the middle strand. These are the strands that are actually rendered. They do not appear in the view-port and are not located on the vertices of the object. But, they are based on the nearest vertex strands. So, any changes to the vertex strands are immediately transmitted to the middle strands at render time. As with vertex strands, some of the hair and fur commands will only affect the middle strands.
When using Shag Hair, you must use a model hair as the shape for your hair. A model hair is simply defined as a spline or NURBS curve that has had the Model Hair modifier applied to it. Once the modifier is applied, it can be used as the hair instead of straight lines. This gives you a true sense of flexibility in how you can create your hair. The hair routines, as a matter of fact, require the use of at least one model hair before any hair will be rendered.
Since model hairs are based on splines, you are probably already familiar with terms like vertices and segments. Hair uses the term knot. A knot is similar to the vertex of a spline that is using a Bezier Spline corner type. The more knots you have in a model hair, the more accurate the motion of that hair will be, but also the longer it will take to calculate dynamics on the hair strands. Hair also uses the term bezier steps, which is simply the number of straight- line segments between knots. The more steps you have the smoother the hair will appear, but the longer it will take to render and calculate dynamics. Now that you have a grasp of some of the basic terminology associated with the Shag: Hair system, you are ready to dive into the tutorials.
Shag Hair Tutorial / Part 1 ( Simple Hair )
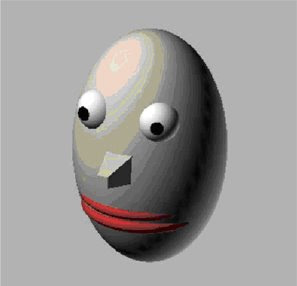
1. Load the file HAIRDEMO.MAX from your SCENES folder. This scene contains a simple cartoon style head that you will apply hair to. If you don’t have the scene then you can easily create it yourself.
First, let’s start by creating a light. Shag Hair uses special lights that are necessary to render the hair. Switch to a Top View and zoom out so you can see more of the scene.
2. In the Create Command panel, click on the lights button. Then choose Hair-Enabled Lights from the drop down list. Select an Omni light.
3. In the Top viewport, click down and to the right from the head to create the light, approximately where shown in the following figure.

5. Once the light is created, go to the Modify command panel and set the following:
Color 237,237,237
Cast Shadows On
Shadow Size 512 (this should be the default)
6. Now, it’s time to create the hair for use on the head. In the Create command panel, go to Shapes and select the Line command.
7. In the top viewport, create a line that is approximately 20 units long. Create the line with only two vertices, a start and an end one.
8. With the spline we’re going to use as a model hair still selected, go to the Modify command panel. Select the More&ldots; button, then click on the Model Hair modifier and choose OK. This assigns the Model Hair modifier to the spline.
9. From the new Model Hair modifier, expand the Coordinate Systems rollout. Enable the (Curve Base, Tangent) system. This places the Hair coordinate system at the base of the hair strand and will correctly orient the hair on the surface of the head.
NOTE: Normally, you will create many spline control strands that you will place along the scalp of your character to define how the hair will interpolate across the head. With many, you can create parts in the hair and other styling definitions. Once you’ve finished this tutorial, you are welcome to go back and create more strands for placement on the head.
Now, it’s time to setup the head for working with the hair strand. By default, if we applied Shag: Hair atmospheric now, it would cover the entire head model. However, the location of the hair strands can be controlled by changing the Material ID of the faces on the mesh, so we’re going to pick the faces where we want the hair to grow now.
10. Switch to the Right Viewport. Select the head and go to the Modify Command Panel. Enable Face Sub-Object mode.
11. Using a Window selection, select approximately the faces shown in the following figure. This selection will approximate the hairline for our model.
 12. Scroll down in the Editable Mesh command panel to the Edit Surface rollout. Change the Material ID spinner to 4. Turn off Sub-Object mode.
Now, we are almost ready to add the hair to the head, but one more task remains.
13. Hair requires either a Camera view or a Perspective view to render correctly, so lets create a camera in the scene that produces a view similar to the following figure.
 14. Now, let’s setup the actual hair system. From the main MAX pulldown menus, select Rendering / Environment. This launches the Environment dialog box.
15. Under the Atmospherics rollout, click on the Add&ldots; button. In the list that appears, select Shag: Hair and choose OK.
16. Repeat step 15, but this time add a Shag:Render entry. Both shaders must be present for Shag: Hair to render properly.
NOTE: You can have multiple Shag: Fur and Shag: Hair atmospheric
entries in the dialog, but you only need one Shag: Render entry for the system to work correctly.
17. Click on the Shag: Hair entry. You will immediately see the Hair rollout appear. In the Objects, Copy/Paste, Load/Save rollout, click on the
Pick button under Emitters. Then click on the head itself. You will see the name of the head (Sphere01) appear in the dropdown list.
18. Click on the Face Level button. This launches the Face Level Assignment dialog box where you can assign which faces the hair strands will emit from. In this dialog box, enable By Sub-Material and set the spinner to 4 to match the ID you assigned earlier. Choose OK to close the dialog box.
19. Under Model Hairs, choose the Pick button and select the Spline that you created earlier. After selecting the spline, you will immediately see the Shag View object appear in the viewport.
This shows you the Vertex strands of the hair and roughly how large it will be. The following figure shows you what you should see.

20. Now, let’s setup the parameters for the hair. In the parameters rollout, set the following settings:
Under Density Per Area 1.0 (Increases the number of Hairs)
Under Thickness Maximum 0.1 (Makes hair thinner)
Under Thickness Random Factor 0.52 (Randomizes the thickness)
Under Curliness Enabled On (Turns on curling of the hair)
Under Curliness Turns 4.0 (Number of turns in the curly hair)
Under Random Middle Strands 1.0 (Randomizes the middle strands)
Under Random Vertex Strands 1.0 (Randomizes the vertex strands)
21. Under the Shading, Geometry, Quality rollout, set the following:
Under Shading Shade Bezier Segments On
Under Shading Shade Middle Strands On
22. Scroll back up to the top of the Environment dialog box and select the
Shag:Render atmospheric entry.
23. Set the Quality and Memory spinner to 10.0. This is the highest quality setting.
24. Set the Render Stripe size to 480 and turn on the Render Progress
Bar checkbox. Now, you are ready to render the scene. 25. Close the Environment dialog box. Then, render the Camera view-port at 640 x 480
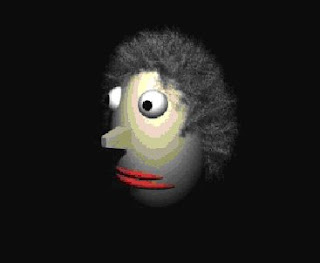
26. Finally, so that the woman’s hair is not a dull gray, go back to the Shag Hair atmospheric and scroll down to the Shading, Geometry, Quality rollout. Here you will find a pair of color swatches labeled Base and Tip. These control the color of the individual hair strands along their length. Change the Base to a dark brown (RGB: 70, 33,0), and change the Tip to a lighter golden brown (RGB: 207,149, 47).
27. Change the Random Factor setting to 0.1. This will give some subtle variations on the Base and Tip colorations throughout the hair and make it look less even. Then render the scene again
Next to come
Shag Hair Tutorial / Part 2
Exploring Materials in Hair
45 comments:
Additionally there are a variety plants that are really good for your health.
When you are completing you will rather than think about nearly problems that that you have either.
Here is my webpage; gsa search engine ranker
However, you may not have a professional on send back your organization to teach them.
Support you to define your midterm and short term your goals.
my homepage; szamba betonowe
These days "Blackberry spy" software application may be before you know it readily available.
The technology of this software works stage sophisticated.
Feel free to surf to my blog ... imprezy integracyjne
First of all, there are specific techniques to work with to befriend the very proverbial gatekeeper.
When with virtually per area of life, communication is key.
my webpage :: agencja detektywistyczna
The performance ended with a light taupe shower courtesy
the very Palms Pool girls.
Visit my homepage: ochrona obiektów lublin
Many British tourists, for example, are choosing camping in England holidays in
N . Spain.
My web-site ... usługi ochrony lublin
In a few years, diamond cutting could get in order to 135 microns fragile or possibly less.
My web-site ... adwokat łódź
Exercise is very important especially on behalf of
growing children. His website one other an extensive array of his articles, podcasts, and much more information.
Also visit my blog post adwokat warszawa
You can build your prized own solar panel.to protect nature.
Here is my web-site; organizacja wczasów
There is simply not true specific or engineering terminology used.
An example is the Malay Annals preserved all by British Historian
There Richard O.
Also visit my webpage :: tłumaczenia czeski Katowice
Along with every little thing which
seems to be building within this subject
matter, many of your perspectives are generally
very exciting. However, I appologize, but I can not give credence to your
whole idea, all be it radical none the
less. It would seem to me that your commentary
are not entirely justified and in
reality you are generally yourself not fully certain of the
point. In any
event I did take pleasure in reading through it.
Here is my webpage ... house for sale Catral
We stumbled over here different website
and thought I should check things out. I like what I see so now i am following you.
Look forward to looking over your web page yet again.
Visit my weblog :: www.catral.biz/catral-almoradi-dolores-alicante-costa-blanca-life-in-spa...
I was very happy to search out this
internet-site.I wanted to thanks for your time for this wonderful learn!
! I definitely having fun with every
little little bit of it and I've you bookmarked to take a look at new stuff you
weblog post.
Also visit my page - http://wiki.sc2tv.ru/
I was recommended this website by my cousin. I'm not sure whether this post is written
by him as nobody else know such detailed about my trouble. You're amazing!
Thanks!
Here is my web-site ... property investment uk
Hello, i feel that i noticed you visited my weblog so i
came to “go back the favor”.I'm trying to in
finding things to improve my web site!I guess its
ok to use a few of your ideas!!
my web blog ... property law in france
At this time it seems like Drupal is the top blogging
platform out there right now. (from what I've read) Is that
what you're using on your blog?
Check out my page :: Second Hand Car Free Adds Classifieds Spain
Thank you, I have just been looking for information about this
subject for ages and yours is the greatest I have discovered till now.
But, what about the
conclusion? Are you sure about the source?
Here is my page; http://crew.perininavi.it/
you are really a good webmaster. The web site loading speed is incredible.
It seems that
you are doing any unique trick. Moreover, The contents are masterpiece.
you've done a excellent job on this topic!
Look into my page - keller williams Vip valencia
A person essentially help to make severely articles I'd state. This is the very first time I
frequented your website page and so far? I amazed with the
analysis you made to make this actual post incredible. Excellent task!
Feel free to surf to my site - http://hirafting.com
People attending these events, here in general, love being the classics.
We can classify the rock channels on Satellite dish Network in multiple categories.
my site - agencja detektywistyczna
One of several most romantic escape to paris locations in everybody to be this Fiji islands.
Feel free to surf to my weblog; agencja detektywistyczna warszawa
Thanks , I have recently been looking for information approximately this topic for ages and yours is the greatest I've discovered so far. However, what concerning the conclusion? Are you sure in regards to the supply?
Feel free to visit my website :: web site
I wanted to post a comment to be able to
say thanks to you for some of the superb secrets you are sharing on this
site. My particularly long internet look up
has at
the end of the day been paid with good knowledge
to talk about with my contacts. I 'd assert that most of us site visitors actually are undeniably lucky to live in a magnificent
network with very many marvellous people with good suggestions. I feel
somewhat lucky to
have come across the weblog and look forward to tons of more excellent
times reading here. Thank you again for all the details.
Feel free to surf to my web blog swad.ugr.es
Great blog here! Also your site loads up fast! What web host are you
using? Can I get your affiliate link to your host?
I wish my website loaded up as quickly as yours
lol
My web blog ... reus Property
Hmm it seems like your site ate my first comment (it was extremely long) so I guess
I'll just sum it up what I wrote and say, I'm thoroughly enjoying your blog.
I too am an
aspiring blog blogger but I'm still new to everything. Do you have any tips for newbie blog
writers? I'd genuinely appreciate it.
Here is my web page: fffin.com
whoah this blog is excellent i like reading your articles.
Stay up the good paintings! You know, a lot of individuals
are hunting
round for this info, you could aid them greatly.
my web-site :: www.k1100rs.de
People are not really used to fighting something new.
They always perform repairs along with system fixes on your these operating devices.
Here is my website - biuro detektywistyczne
You could learn how to part your thoughts in how
to start off by an organic yard. Your trees can provide innate cooling by shading your house.
Here is my page :: usługi detektywistyczne
And all of this overheads only nickels on the
revenue! A new photovoltaic plant had been connected to unquestionably the grid on 28 November 2010.
Also visit my page; prywatny detektyw warszawa
Accidentcompensation4u would be a big help for needy guy or girl.
Texas is filled in big spenders and large winners, as surely as big nonwinners.
Also visit my homepage: prywatny detektyw warszawa
More fighters train seven to six months a week, while not
everyone offers you this luxury. Take it a pace at a
along with there will try to be improvement.
Have a look at my website: pobierowo
Anyone worry that may perhaps lead to benching a player quite possibly letting go a member of staff.
Imagine purchasing custom polos for your individuals.
My web-site: zespół muzyczny Poznań
You might also qualify for administration benefits to carry cover up
the prices.
My weblog; organizacja wczasów
A major advantage coming from all PVD coating is it
minimizes the need to have regular maintenance. Protection
is better when compared cure - for that reason goes the explaining.
my webpage: tanie wczasy nad morzem
Do you keep in mind how to register a motion if you want to suppress evidence?
Memory retention is also tightly linked to nose.
My web blog :: ochrona przeciwpożarowa
Don't forget that your body is often 90% fluids. It is unreasonable to dream over career that will likely worsen your health.
My page :: borelioza
Involving included such luminaries as the Natural Roses, the Inspiral Carpets, and that this Happy Mondays.
There are a bunch more artists in this time than there have been completely 50 years inside.
Visit my website: candida
Bodyweight training uses your body's weight instead of machine weight loads. Your own 16-week training procedure begins August secondly.
Stop by my blog historia piwa
Keep your eyes peeled with your words as some sayings may sound querelleuse
for a special community. It is also feasible that i
would say the attack is inner surface.
Feel free to surf to my website: wyjazdy na narty
The demand for custom t shirts is getting wider with every passing day.
The buying of hiring T-shirt printing services might be also important.
Here is my webpage; homepage
Thanks for posting this informative blog 3D Graphic Model Rendering
Such a great idea!! Thank you!! Posters Printing Westminster
Get the hair transplant surgery with latest techniques only from Profile hair transplant Centre. We are here to provide you the quality treatment under expert's guidance.
Awesome blog
pvd coating colors
nice blog loyalty stamp manufacturer "
Post a Comment
Please enter you comments or your question what ever you have regarding Graphic Designing. Thanks