 2nd Way
A Text Interacts With A Black Shape
1. Let’s start again from the beginning. Very important, via the View menu, Overprint Preview must be enabled.
2. Draw a shape and colorize it with a Black color, not the default [Black] between brackets, just select the [Black] and by clicking on the New Swatch button at the bottom of the Swatches palette create a new “Black 2”. You can change its name to “Black 100K” for instance.
3. Deselect everything with Cmd- Shift-A / Ctrl-Shift-A and in the Swatches palette’s fly-
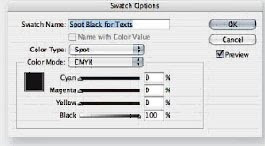
 out menu > New Color Swatch... - Color Type : Spot - Name : Spot Black for Texts and click OK.
4. Now select the text with the Text Tool and colorize its Fill with the “Spot Black for Texts” spot color.
5. Select the Black Arrow so the text frame is selected. Right-click > Arrange > Send to Back so the text frame is behind the black circle.
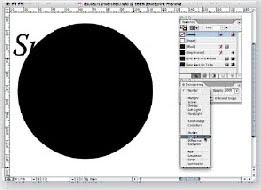
6. Select the black circle alone and in the Transparency palette, choose the Lighten blending mode. Turn this page to see the final result...
Warning : if you have reproduced the steps to create this effect on a white backgro
 und, it works perfectly. But if you place the logo on a colored background, the black text will disappear. The workaround is simple and is explained on the previous page (step 6).
7. Move the text frame to see a real-time reversed text effect. The problem now is that a spot color is involved but the goal is usually to print in CMYK mode without a Black spot color. InDesign’s Ink Manager and “Ink Aliases” features can’t convert all spot inks to process inks without discarding the reversed text effect. Fortunately, Acrobat Professional will do it perfectly. Thus...
8. Export the document in PDF format using the [PDF/X-1a:2001] preset for instance and add other options like bleed and cropmarks.
9. Open the PDF in Acrobat Professional and display Tools > Print Production > Ink Manager...
10. Select the “Spot Black for Texts” spot ink and at the bottom of the window > Ink alias > Process Black then click OK.
11. Tools > Print Production > Output Preview... The PDF is indeed in CMYK mode and both Blacks are on the Process Black plate ; no more spot ink.
12. Check the color separation : File > Print > Advanced... (button) then Output > Color > Separations then close the dialog box with OK and then OK to print. The black objects will only appear on the Black plate. File > Save as... the PDF.
0 comments:
Post a Comment
Please enter you comments or your question what ever you have regarding Graphic Designing. Thanks